Showing posts with label Slowcooker. Show all posts

Monday, 15 June 2026

Slow cooker beef ragu with pappardelle


Video

This slow cooker beef ragu with pappardelle is rich, tender and full of deep flavor 🤍

Slow cooked beef in a thick tomato sauce over silky pasta is pure comfort food

Ingredients

  • • 2 lb beef chuck roast
  • • 12 oz pappardelle pasta
  • • 1 small onion, chopped
  • • 3 cloves garlic, minced
  • • 1 cup crushed tomatoes
  • • 1 cup beef broth
  • • 2 tbsp tomato paste
  • • 1 tsp Italian seasoning
  • • 1/2 tsp salt
  • • 1/2 tsp black pepper

Instructions

  1. Place beef, onion and garlic in the slow cooker
  2. Add crushed tomatoes, beef broth and tomato paste
  3. Season with Italian seasoning, salt and pepper
  4. Cover and cook on LOW for 7–8 hours
  5. Shred the beef with forks and stir into the sauce
  6. Cook pappardelle pasta until al dente
  7. Add pasta to the slow cooker and toss with sauce
  8. Serve hot with extra sauce on top

Monday, 1 June 2026

Chicken and Noodles - Slow Cooker


Video

Slow Cooker Fakeaway you NEED to make🥡

Shopping list:

  • * 600g chicken breast, diced
  • * 3 packets straight-to-wok noodles
  • * green pepper, slice
  • * 1 red pepper, sliced
  • * 1 onion, sliced
  • * 1 tbsp sesame oil
  • * 1 tbsp Siracha sauce
  • * 2 tbsp hoisin sauce
  • * 50ml reduced-salt soy sauce
  • * 1 tbsp cornflour
  • * 1/2 tsp Chinese 5 spice

Directions

Trhough everything but noodles into slowcooker

High Heath fo 2.5 hours

If you want to add noodles, add them at the 2 hour mark

Nutrition

Serves 4

Each serving:

Calories 530

Protein 43 g

Carbs 56 g

Fat 12 g

Fibre 6 g

Saturday, 4 January 2025

Slow Cooker Cheeseburger Soup


Article

  • Prep Time:15 mins
  • Cook Time:8 mins
  • Slow Cook Time:4 hrs 30 mins
  • Total Time:4 hrs 53 mins
  • Servings:6

Ingredients

  • 1 pound ground beef
  • 1/2 cup chopped yellow onion
  • 2 1/2 cups lower sodium beef broth
  • 2 russet potatoes, peeled and chopped
  • 1 (14.5-ounce) can diced tomatoes, undrained
  • 1 (10.5-ounce) can condensed Cheddar cheese soup
  • 1 (8-ounce) can tomato sauce
  • 1/4 cup ketchup, plus more for garnish
  • 2 tablespoons yellow mustard, plus more for garnish
  • 1 cup shredded Cheddar cheese, plus more for garnish
  • 1/2 cup chopped dill pickle slices
  • 1/4 cup finely chopped red onion


Directions

  1. Gather all ingredients. 
  2. Cook ground beef and yellow onion in a large skillet over medium heat until browned, stirring to break up with a wooden spoon, about 8 minutes; drain fat.
  3. Transfer beef mixture to a 4- to 5-quart slow cooker. Add beef broth, potatoes, tomatoes, soup,  tomato paste, ketchup, and mustard. Stir to combine. 
  4. Cover and cook on Low 9 to 10 hours or on High 4 1/2 to 5 hours, until potatoes are tender.
  5. Stir Cheddar cheese into the soup. 
  6. Garnish servings with pickles, red onion, additional cheese, ketchup and mustard.


Monday, 28 October 2024

Korean BBQ Beef Bowls

Video

  • 1.5 lbs beef stew meat
  • 1/3 cup low-sodium soy sauce or coconut aminos
  • 1/4 cup rice vinegar
  • 1/4 cup honey or maple syrup
  • 4 garlic cloves, minced
  • 1 tbsp fresh ginger, grated
  • 1 tbsp sesame oil
  • 1 tbsp sriracha
  • 2 cups broccoli florets (add 1 hour before serving)
  • 1/4 cup green onions, chopped
  • Sesame seeds for garnish
  • Cooked brown rice or cauliflower rice for serving


Instructions:

  1. Add beef, soy sauce, rice vinegar, honey, garlic, ginger, sesame oil, and sriracha to the crockpot. 
  2. Stir to combine. 
  3. Cook on low for 6-7 hours. 
  4. Add broccoli in the last hour of cooking. 
  5. Serve over brown rice, garnished with green onions and sesame seeds.

Sunday, 21 July 2024

Slow Cooker Red Wine Braised Beef


Article 

Ingredients

serves 6-8

  • 1 1/2 Tablespoons olive oil
  • salt and freshly ground pepper, to taste
  • 2 pounds beef roast 
  • 2 cups shallots, thinly sliced
  • 7 to 8 cloves garlic, peeled and thinly sliced
  • 4 sprigs fresh thyme
  • 2 sprigs fresh rosemary
  • 28 ounces pureed tomatoes
  • 1/2 cup sun-dried tomatoes (not in oil), minced
  • 2 cups dry, red wine
  • 1 cup beef broth
  • 1 pound egg noodles, cooked or 4-5 Potatoes to make mashed potatoes
  • 4 cups arugula


  1. Season the beef generously with salt and pepper. In a large skillet over medium-high heat, warm the olive oil. When the oil is hot, add the beef and sear, turning as necessary, until it is a deep golden brown on all sides.
  2. In the meantime, grease your Crockpot. Add shallots and garlic to the bottom of your slow cooker. Place the seared beef on top of the garlic and onions. Scatter the thyme and rosemary sprigs over the meat. Top with the pureed tomatoes, as well as the sun-dried tomatoes.
  3. Pour the beef broth into the pan you used to sear the beef, making sure to scrape up  any little bits left there. Pour into the Crockpot, along with the red wine. Add more salt and pepper, to taste.
  4. Cook on low for six to eight hours, until the meat is fork tender and falling apart. Remove the sprigs of thyme and rosemary. Using two forks, pull the beef into chunks or shreds.
  5. Distribute the cooked egg noodles (of course, you could use polenta or cauliflower rice instead) among your serving bowls. Top each with a big handful or two of arugula.

Wednesday, 4 January 2023

Crockpot Sun-Dried Tomato Chicken.


Prep Time15 mins
Cook Time2 hrs
Total Time2 hrs 15 mins
Course: Main Course
Cuisine: American
Diet: Gluten Free
Key Ingredient: chicken, mustard, sun-dried tomatoes
Servings: 6
Calories: 398kcal

Ingredients

  • 1 (8 ounce) jar oil-packed sun-dried tomatoes
  • 2 pounds boneless skinless chicken thighs or breast
  • 1 shallot, chopped
  • 2 cloves garlic, chopped
  • 1 tablespoon Italian seasoning (see note)
  • 1 teaspoon paprika or smoked paprika
  • chili flakes
  • kosher salt and black pepper
  • 1 tablespoon dijon mustard
  • 1 tablespoon grainy dijon mustard
  • 1/2 cup dry white wine
  • 2 tablespoons lemon juice
  • 1 cup heavy cream
  • 3/4 cup grated parmesan cheese + the rind
  • 2 cups fresh baby spinach

Instructions

Crockpot

  • 1. Drain 2 tablespoons of oil from the sun-dried tomato jar into the crockpot. Chop the sun-dried tomatoes and set aside.
    2. In the crockpot, rub the chicken with the shallot, garlic, Italian seasoning, and the mustards. Season with salt, pepper, and chili flakes. Add the sun-dried tomatoes. Pour over the wine. Add the lemon juice and parmesan rind (if using). Cover and cook on low for 2-4 hours or on high for 1-2 hours.
    2. Preheat the broiler to high. Remove the chicken from the slow cooker and place on a baking sheet.
    3. Crank the heat on the slow cooker to high. Stir in the cream, spinach, and parmesan.
    4. Rub the chicken with the reserved oil, then broil 2-5 minutes, until crisp. Serve the chicken and sauce over creamy polenta, rice, or with crusty bread.

Instant Pot

  • 1. Drain 2 tablespoons of oil from the sun-dried tomato jar into the crockpot. Chop the sun-dried tomatoes and set aside.
    2. Set the instant pot to saute, rub the chicken with the oil, the shallot, garlic, Italian seasoning, and the mustards. Season with salt, pepper, and chili flakes. Add the chicken to the instant pot and sear until golden brown on both sides, about 3 minutes per side. Add the sun-dried tomatoes. Pour over the wine. Add the lemon juice and parmesan rind (if using). Cover and cook on high pressure for 8 minutes.
    3. Once done cooking, release the steam. Set the Instant pot to sauté. Stir in the cream, spinach, and parmesan.
    4. Serve the chicken and sauce over creamy polenta, rice, or with crusty bread.

Stove

  • 1. Drain 2 tablespoons of oil from the sun-dried tomato jar into the crockpot. Chop the sun-dried tomatoes and set aside.
    2. Heat a large dutch oven over medium-high heat. Rub the chicken with the oil, the shallot, garlic, Italian seasoning, and the mustards. Season with salt, pepper, and chili flakes. Add the chicken to the pot and sear until golden brown on both sides, about 3 minutes per side. Add the sun-dried tomatoes. Reduce the heat to medium. Pour in 3/4 cup wine. Add the lemon juice and parmesan rind (if using). Cover and cook 10-15 minutes.
    3. Stir in the cream, spinach, and parmesan.
    4. Serve the chicken and sauce over creamy polenta, rice, or with crusty bread.

Notes

Italian Seasoning: Mix 2 tablespoons dried basil, 2 tablespoons dried oregano, 2 teaspoons dried thyme, 1 teaspoon dried rosemary, and 1 teaspoon dried sage. Store in a sealed container.

Nutrition

Calories: 398kcal

Tuesday, 22 November 2022

Slowcooker Short Ribs


https://www.delish.com/cooking/recipe-ideas/a29492060/slow-cooker-short-ribs-recipe/

Saturday, 28 November 2020

Slow Cooker Chicken Curry with Potatoes and Cauliflower


Ingredients

  • 2 3/4 pounds skinless, boneless chicken thighs
  • Kosher salt and freshly ground pepper
  • 1 1/2 tablespoons canola oil
  • 3 garlic cloves, minced
  • 2 tablespoons minced fresh ginger
  • 1 onion, cut into 1/2-inch dice
  • 2 tablespoons Madras curry powder
  • 1/2 cup low-sodium chicken broth
  • 2 baking potatoes, peeled and cut into 1-inch dice
  • 1 small head of cauliflower, cut into 1 1/2-inch florets
  • One 15-ounce can unsweetened coconut milk
  • 3/4 cup frozen baby peas, thawed
  • 1/3 cup coarsely chopped cilantro

Directions

Step 1

  1. Pat the chicken dry with paper towels, then season the chicken with salt and pepper. In a large nonstick skillet, heat the oil until shimmering. 
  2. Add the chicken in batches and cook over moderately high heat until golden on both sides, about 8 minutes. 
  3. Transfer the chicken to a slow cooker.

Step 2

  1. Add the garlic, ginger and onion to the skillet and cook over moderate heat until fragrant and softened slightly, about 1 minute. 
  2. Add the curry powder and cook until fragrant, about 30 seconds. 
  3. Add the chicken broth and cook for about 1 minute, scraping up the browned bits from the bottom of the pan. 
  4. Scrape the contents of the skillet into the slow cooker. Stir in the potatoes and cauliflower and season with salt and pepper. 
  5. Cook on high for about 3 hours, until the chicken is white throughout and the vegetables are tender.

Step 3

  1. Using a slotted spoon, transfer the chicken and the vegetables to a serving bowl and keep warm. 
  2. Pour the juices into a small saucepan. 
  3. Boil the juices over moderately high heat until reduced to 1/2 cup, about 10 minutes. 
  4. Whisk in the coconut milk. 
  5. Bring to a simmer and season with salt and pepper. 
  6. Stir in the peas and cook until warmed through, about 30 seconds. 
  7. Pour the curry sauce and peas over the chicken, sprinkle with the cilantro and serve.

Tuesday, 12 November 2019

Herbed Slow-Cooker Chicken

Herbed Slow-Cooker Chicken

Ingredients

  • 1 tablespoon olive oil
  • 1 teaspoon paprika
  • 1/2 teaspoon garlic powder
  • 1/2 teaspoon seasoned salt
  • 1/2 teaspoon dried thyme
  • 1/2 teaspoon dried basil
  • 1/2 teaspoon pepper
  • 1/2 teaspoon browning sauce, optional
  • 4 bone-in chicken breast halves (8 ounces each)
  • 1/2 cup chicken broth

Directions
  1. In a small bowl, combine the first 7 ingredients and, if desired, browning sauce; 
  2. rub over chicken. 
  3. Place in a 5-qt. slow cooker; add broth. 
  4. Cover and cook on low until chicken is tender, 4-5 hours.
Test Kitchen Tips
  • Good cooks like to keep some go-to meals on hand that don’t require a special trip to the store. Keep chicken breasts in the freezer and you’ll always be ready.
  • During the summer, be sure to use plenty of fresh garden basil to savory recipes like this one!
  • Here are 30-min chicken breast recipes you can rely on.

Nutrition Facts
1 chicken breast half: 211 calories, 7g fat (2g saturated fat), 91mg cholesterol, 392mg sodium, 1g carbohydrate (0 sugars, 0 fiber), 33g protein. Diabetic Exchanges: 5 lean meat, 1 fat.

Tuesday, 8 January 2019

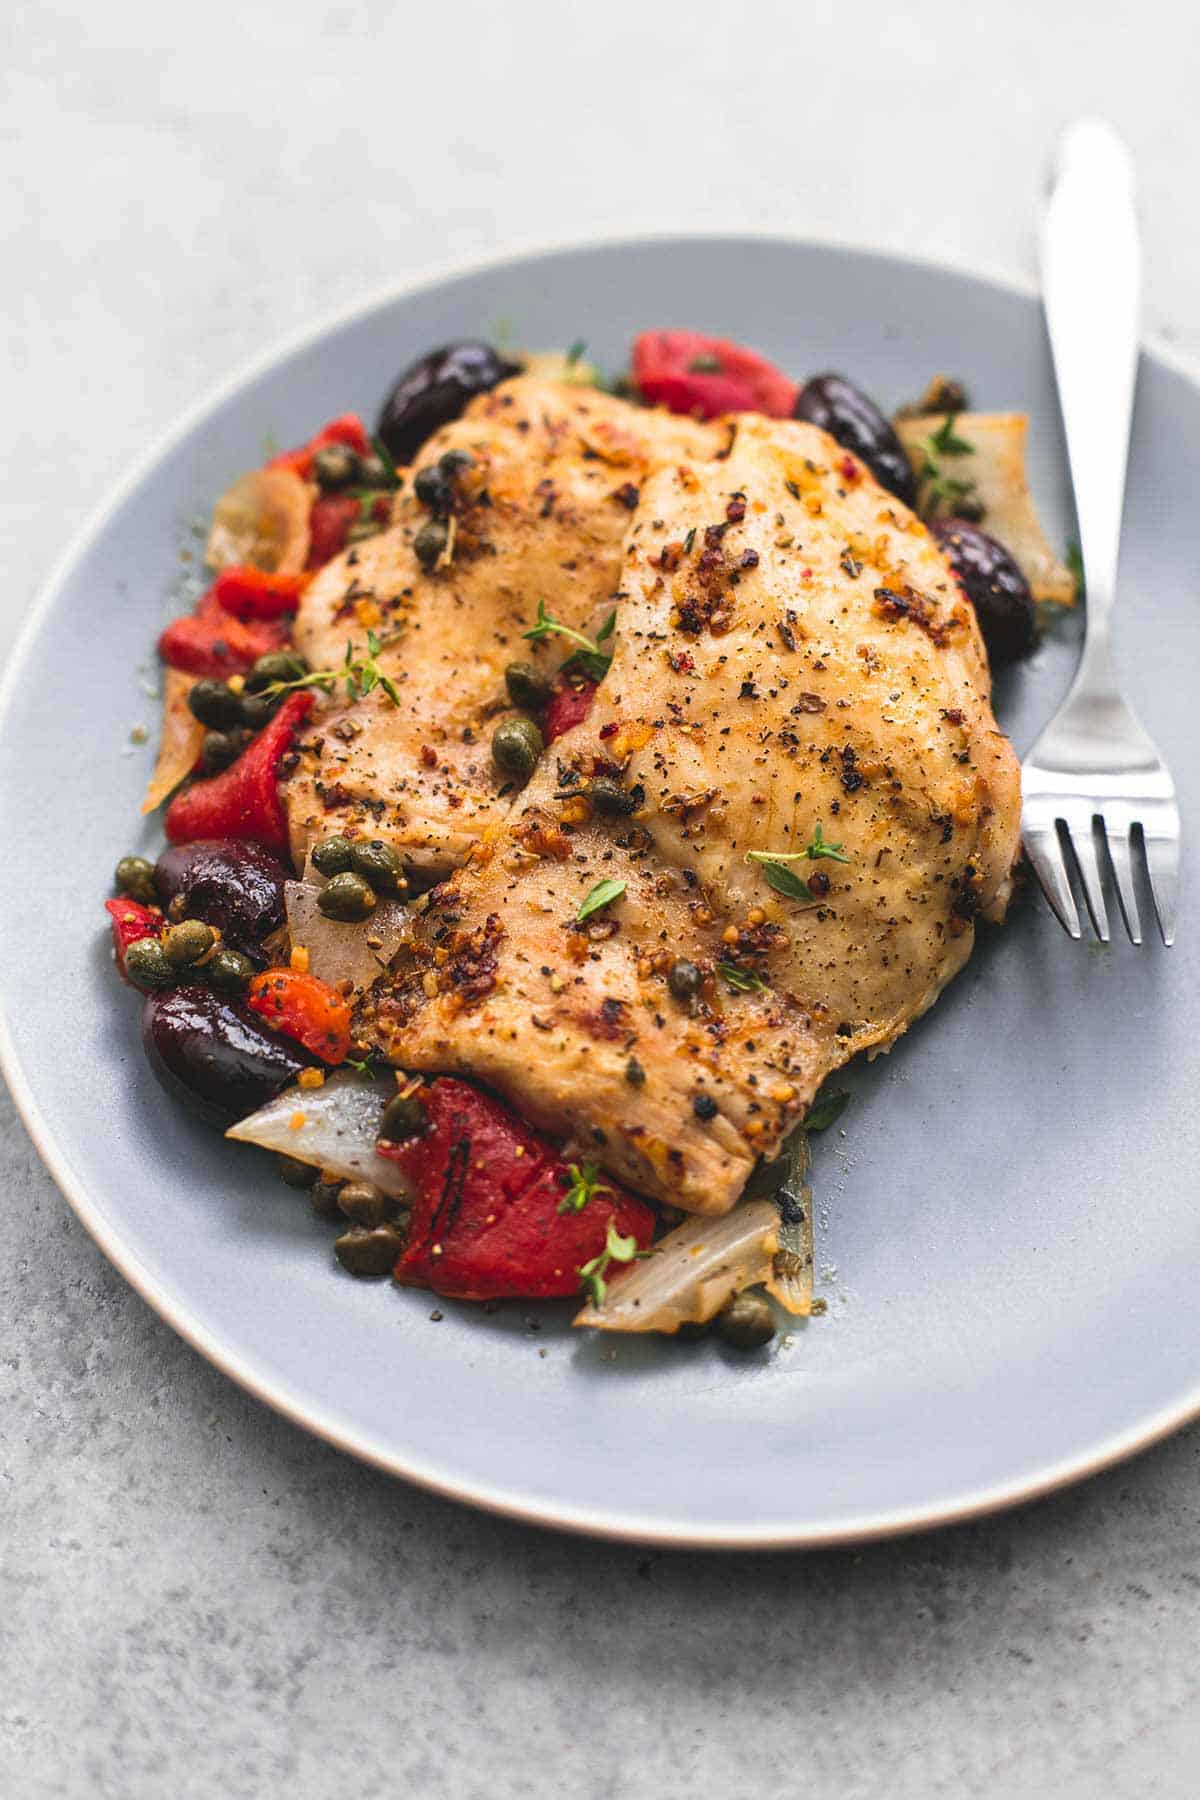
Slow Cooker Mediterranean Chicken

Slow Cooker Mediterranean Chicken | lecremedelacrumb.com

PREP TIME 5 MINUTES
COOK TIME 4 HOURS
TOTAL TIME 4 HOURS 5 MINUTES
SERVINGS 4

Ingredients

  • 4 medium-large boneless skinless chicken breasts OR 4-6 boneless skinless chicken thighs
  • salt and pepper to taste
  • 3 teaspoons Italian seasoning
  • juice of 1 medium lemon (about 2 tablespoons)
  • 1 tablespoon minced garlic
  • 1 medium onion, chopped
  • 1 cup kalamata olives
  • 1 cup roughly chopped roasted red peppers
  • 2 tablespoons capers
  • fresh thyme or basil for garnish (optional)

Instructions
  1. Season chicken with salt and pepper to taste. 
  2. Cook in a large skillet over medium-high heat 1-2 minutes on each side til browned. 
  3. Transfer to greased slow cooker.
  4. Add onions, olives, red peppers, and capers to slow cooker (tuck them around the sides so they aren't covering up the chicken). Whisk together italian seasoning, lemon juice, and garlic and pour over chicken.
  5. Cover and cook on low for 4 hours or on high for 2 hours. 
  6. Garnish with fresh thyme or oregano and serve.

Wednesday, 2 January 2019

Complete Guide to Sous Vide Salmon


You think chicken breasts are delicate? Salmon has it beat by a mile. With practice, you can get to the point of nailing a perfect medium-rare center on a piece of poached or pan-seared salmon. But practicing on salmon can get pricey, and sous vide will guarantee perfectly moist, tender results each time. Sous vide also allows you to achieve textures you never knew were possible, from buttery-soft to meltingly tender and flaky-yet-moist.
The downside of cooking salmon (and other flaky fish) sous vide is that the fish becomes very delicate after cooking, which means that you'll need to take a little bit of care in handling it to prevent it from flaking before it hits the plate. But that's a small price to pay for the moistest fish you'll ever taste.
What Temperature and Timing Should I Use?
As with eggs, the softly setting proteins in salmon are extremely susceptible to even minor variations in temperature. The difference between salmon cooked to 120°F (49°C) and 130°F (54°C) is vast. Here are a few recommended temperatures for cooking salmon. My personal favorite is 115°F (46°C)—the fish will come out firm enough that it tastes "cooked," but still extremely moist and buttery-smooth, with just a hint of flakiness.
20160826-sous-vide-salmon-temperature-composite.jpg

Sous Vide Salmon Temperatures

TextureTemperature
Like firm sashimi105°F (41°C)
Soft and buttery110°F (43°C)
Translucent and starting to flake115°F (46°C)
Very moist, tender, and flaky120°F (49°C)
Firm, moist, and flaky130°F (54°C)
As for timing, I find that fish can turn watery and mushy if left in the water bath for too long at low temperatures, and dry and chalky when left too long at above 125°F (52°C) or so. For thinner fillets, half an hour to 45 minutes is plenty; for extra-thick fillets, 45 minutes to an hour is all you need.
Note that salmon doesn't cook at temperatures above the pasteurization point (130°F), so, for safety purposes, I strongly recommend against letting more than three hours pass between the time you start cooking and the time you serve (unless you chill immediately after cooking).

What Kind of Salmon Should I Buy?

Whatever is freshest and fits your budget! Whether you use wild king, sockeye, coho, or any variety in between, the best salmon is always the freshest salmon. Look for salmon with firm flesh that is glistening and doesn't show any indentations from fingerprints or marks of mishandling. Fresh fish should hold its shape after being touched.
When buying salmon, I prefer to buy larger cuts and divide them into individual portions myself so that I get exactly what I want, rather than letting the fishmonger do it for me.

How Do I Portion My Salmon?

When you're portioning a large piece of salmon, the first step is removing the pin bones. Gently run your fingers across the surface of the fish, and, unless the fishmonger or you have already removed them, you'll find a ridge of thin, flexible bones protruding from the flesh.
20160826-sous-vide-salmon-02.jpg
Use a good pair of needle-nose pliers, or, if you have them, some sturdy fish tweezers to pull the bones out. Grasp the tips of the bones, then pull them out by pulling along their length to minimize damage to the surrounding flesh. Make sure you also get any bones that are protruding from the cut faces along the sides of the slice.
20160826-sous-vide-salmon-04.jpg
Salmon is often portioned by cutting crosswise across the entire fish, from back to belly. I find that with a larger king salmon, this creates awkwardly large or skinny portions. I much prefer to first split the fillet down the center along the natural division between the upper half and the belly. Using a sharp knife and steady, long strokes, I slice through the salmon, making sure to cut through the skin as well.
20160826-sous-vide-salmon-06.jpg
Next, I divide each of those halves into even five- to six-ounce portions (you can, of course, make the portions bigger if you prefer). The resulting pieces are closer to square in shape than the long, skinny rectangles you'd get by portioning without splitting.

Should I Brine?

Many recipes for sous vide salmon recommend soaking the fish in a saltwater brine before cooking in order to season it more deeply and to give it a denser, firmer texture. I tried cooking a few pieces of salmon side by side: one plain, one soaked in a liquid salt-and-sugar brine, one soaked in a plain salt brine, one rubbed (dry-brined) with salt and sugar, and one rubbed with salt alone. For the brined and dry-brined salmon, I tested various brining times, ranging from 15 minutes up to overnight. I cooked each sample of salmon sous vide at two different temperatures—115°F and 130°F—for 30 minutes, then tasted them.
The difference is quite striking, with both the salmon that was water-brined and the dry-brined salmon coming out with a firmer, more pleasant flesh. Without any brine, salmon cooked at lower temperatures can taste mushy and watery; at higher temperatures, it will taste dry and chalky. With brine, salmon at low temperatures has a smooth, buttery texture, and at higher temperatures, it retains more moisture.
I found sugar in the brine to be distracting, though, if you like the added sweetness, there's no harm in it. I prefer dry-brining to water-brining for the sake of convenience: All you have to do is salt your salmon, seal it in a bag, then let it rest before cooking. Half an hour seems to be the magic number—you get a strong brining effect, but still keep things moving along in time for dinner.

Should I Add Fat?

When cooking things like steak or chicken, I typically don't add extra fat to the bag—all it does is dilute flavor by removing fat-soluble flavor compounds. With salmon, on the other hand, some sort of fat is essential if you're cooking more than one piece in a single bag. Salmon proteins will bind together when heated while in contact, which means that two adjacent pieces of fish within the same bag can end up fusing into one, tearing and flaking when you subsequently try to separate them before serving. Fat will coat the fish and help prevent this problem.
20160826-sous-vide-salmon-12.jpg
With delicate fish, I also generally like adding a few aromatics to help nudge the flavor along. Most often, I reach for a few fresh thyme sprigs. Adding fat to the bag can help the flavor from these aromatics spread around the salmon more easily.

Skin On or Skin Off?

Sous vide salmon skin can be quite delicious if you sear it until crisp after cooking—think of it as salmon cracklings. But if you prefer your salmon skinless for any reason (say, if you're going to serve it simply poached, without searing), there's a much easier way to get rid of that skin than trying to cut it off before cooking: Just wait until after you've cooked it sous vide. The cooking process weakens the bond between skin and meat, making it very easy to peel it off gently with your fingers.
20160826-sous-vide-salmon-20.jpg
Once the skin is removed, you can also very carefully flake off the dark brown flesh underneath if you'd like. There's no harm in eating it, but some people don't like the way it looks.

Do I Need a Vacuum Sealer?

You don't need a vacuum sealer for sous vide salmon! Because of the short cooking time and low temperature, a regular old zipper-lock bag will work fine. To remove air from a zipper-lock bag without a vacuum sealer, use the water displacement method. It's fast, efficient, and tailor-made for situations like this.
To do it, simply place your food in a plastic bag, and seal the bag almost all the way, leaving about an inch open. Slowly lower the bag into a tub of water, holding the opened end above the water level. As the bag is lowered, the water pressure should force air out of the bag. Just before it fully submerges, seal the bag completely, and you're ready to cook.
How to Seal Foods Air-Free Without a Vacuum Sealer
Serious Eats

VIDEOS

WATCH MORE VIDEOSREPLAY

How Should I Serve It?

Depends on how you like it!

Option 1: Sear It

If you're serving it straight away for dinner, and you enjoy crispy skin, I would suggest searing the salmon skin side down in hot fat (vegetable oil or clarified butter works well) in a skillet. For fully rendered and crisp skin, you do need to leave it in there for a few moments—long enough that you'll start to see some white coagulated proteins around the seared edges of the salmon. This, unfortunately, cannot be helped unless you decide to remove the skin completely and cook it separately for serving. (To do this, peel off the skin, then sear it in a pan while holding it flat with a spatula, or a second pan.)
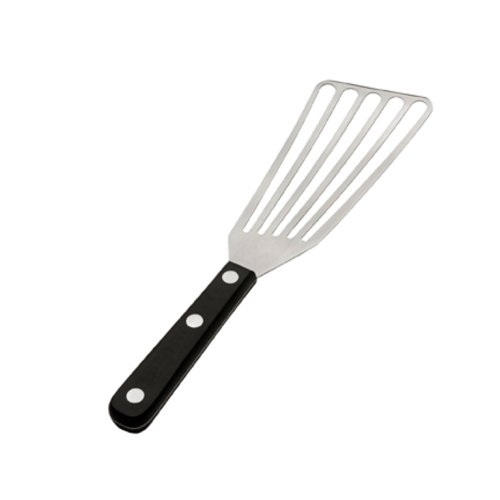
Be very delicate when searing sous vide salmon, as it can fall apart easily. A thin, flexible fish spatula will help with this job.

Option 2: Chill It

Sous vide salmon is great served cold. When it's cooked to 105°F and then chilled, you can slice it and serve it like sashimi, though it will have a unique texture all its own. After cooking it at higher temperatures, you can flake the chilled salmon and serve it in salads, in sandwiches, stirred into pasta, or on top of rice bowls. It's a great way to use up leftovers.

Option 3: Just Serve It

The last option is to skip any post–sous vide treatment and just serve it as is, perhaps coating it with a bit of extra-virgin olive oil or with a flavorful vinaigrette or sauce. Sous vide salmon has an incredibly moist, tender texture that I find lovely even without crisp skin or browning to contrast it.

Sous Vide Salmon, Step by Step

Step 1: Season

20160826-sous-vide-salmon-10.jpg
Season the salmon generously on all sides with salt. You can also season with white or black pepper at this point.

Step 2: Bag and Flavor

20160826-sous-vide-salmon-13.jpg
Place the salmon portions in a single layer inside one or more zipper-lock bags. Add a couple of teaspoons of olive oil per fillet to each bag, turning the salmon and using your hands to make sure that it's coated on all sides in order to prevent sticking. Add some gentle aromatics, like fresh herbs such as thyme, parsley, or dill; thinly sliced shallots; or grated citrus zest. Do not add large chunks of food, which can damage the shape of the fish, or acidic ingredients, which damage the texture.
Once the salmon is bagged, close the bag(s) and let the salmon rest in the refrigerator for at least 30 minutes and up to overnight, to allow the salt to firm up the flesh.

Step 3: Preheat the Water Bath

Set the temperature on your sous vide cooker according to the chart above, and allow it to preheat while the salmon rests.

Step 4: Seal and Cook

20160826-sous-vide-salmon-14.jpg
Remove all the air from the bag or bags using a vacuum sealer or the water displacement method. Then add the salmon to the preheated water bath, and cook for 30 to 45 minutes for one-inch fillets, or 45 minutes to an hour for fillets up to two inches thick.

Step 5: Remove and Dry

20160826-sous-vide-salmon-37.jpg
Carefully remove the salmon from the bag using your hands or a fish spatula, keeping it supported at all times to prevent it from breaking. Place it on a double layer of paper towels, then use another paper towel to gently blot the surface dry. Discard the aromatics at this point.

Step 6: Remove Skin (Optional)

If you like, you can remove the skin at this point as well. It should peel right off.

Step 7: Sear (Optional) and Serve

20160826-sous-vide-salmon-40.jpg
You can serve the salmon immediately as is, chill it and serve it cold, or, for a more classic presentation, sear it briefly before serving. To sear, heat up a thin layer of oil in a cast iron, carbon steel, or nonstick skillet over medium-high heat until shimmering, then add the salmon skin side down, gently pressing on it with a fish spatula so that it makes good contact with the pan. Let it sear until the skin is browned and crisp, about a minute and a half. Flip the salmon, briefly kiss the second side with the pan to give it a touch of color, then remove the salmon and serve.
20160826-sous-vide-salmon-46.jpg
Perfectly moist and tender dinner is ready.